Section 1 - Concept
Section 1.1 - Brainstorming Ideas
For my final semester, I once again wanted to work on a personal project, as I hope to start my own business in the near future. For this project, while I was brainstorming ideas, my wife suggested a witchy game where you "tend to a garden, grow herbs, and look after familiars that you unlock as you level up. [You also] brew potions and learn spells (not like harry potter but like actual witchcraft) and you unlock spells and potions as you level up. [...] They can sell the potions to get money to buy furniture for their house and they can buy pet accessories." I absolutely loved this idea, however, I worried about it being too similar to other games on the market, namely
Potion Craft and
Witchy Life Story. However, I decided that despite the similarities, I would try my hand at a similar game as a project for myself as opposed to being released to the public. While I did use many of the ideas my wife came up with, namely having a familiar, growing herbs, unlocking spells, and buying furniture, there's also many aspects of modern day witchcraft that I wanted to include. As a self-proclaimed witch, I knew many different practices that I have dabbled in and thought would be a cool mechanic to include, such as tarot readings and sigil making. As both previous games include potion/charm making, I wanted to expand from that as well.
Section 1.2 - Game Design
While designing my game, I couldn't get the image of Witchy Life Story out of my head. As much as I wanted to differenciate my game, I kept returning to the idea of the 2D point and click. In addition, I wanted to venture down a different style of game as my personal project for the semester before was the exact same, but after weighing the pros and cons, I ended up deciding that the 2D point and click style would be the best. In addition, I remembered my fascination with the point and click genre the first time I played a point and click game that wasn't made for small children, namely
Broken Age. After that, I designed the room that all of the gameplay would take place in. With my mind still firmly stuck on Witchy Life Story (its a very good game that I highly recommend), I opened it up and plotted out the layout of their room, as I wanted to differenciate mine. After that, I planned mine out next to it, allowing me to compare them side by side.
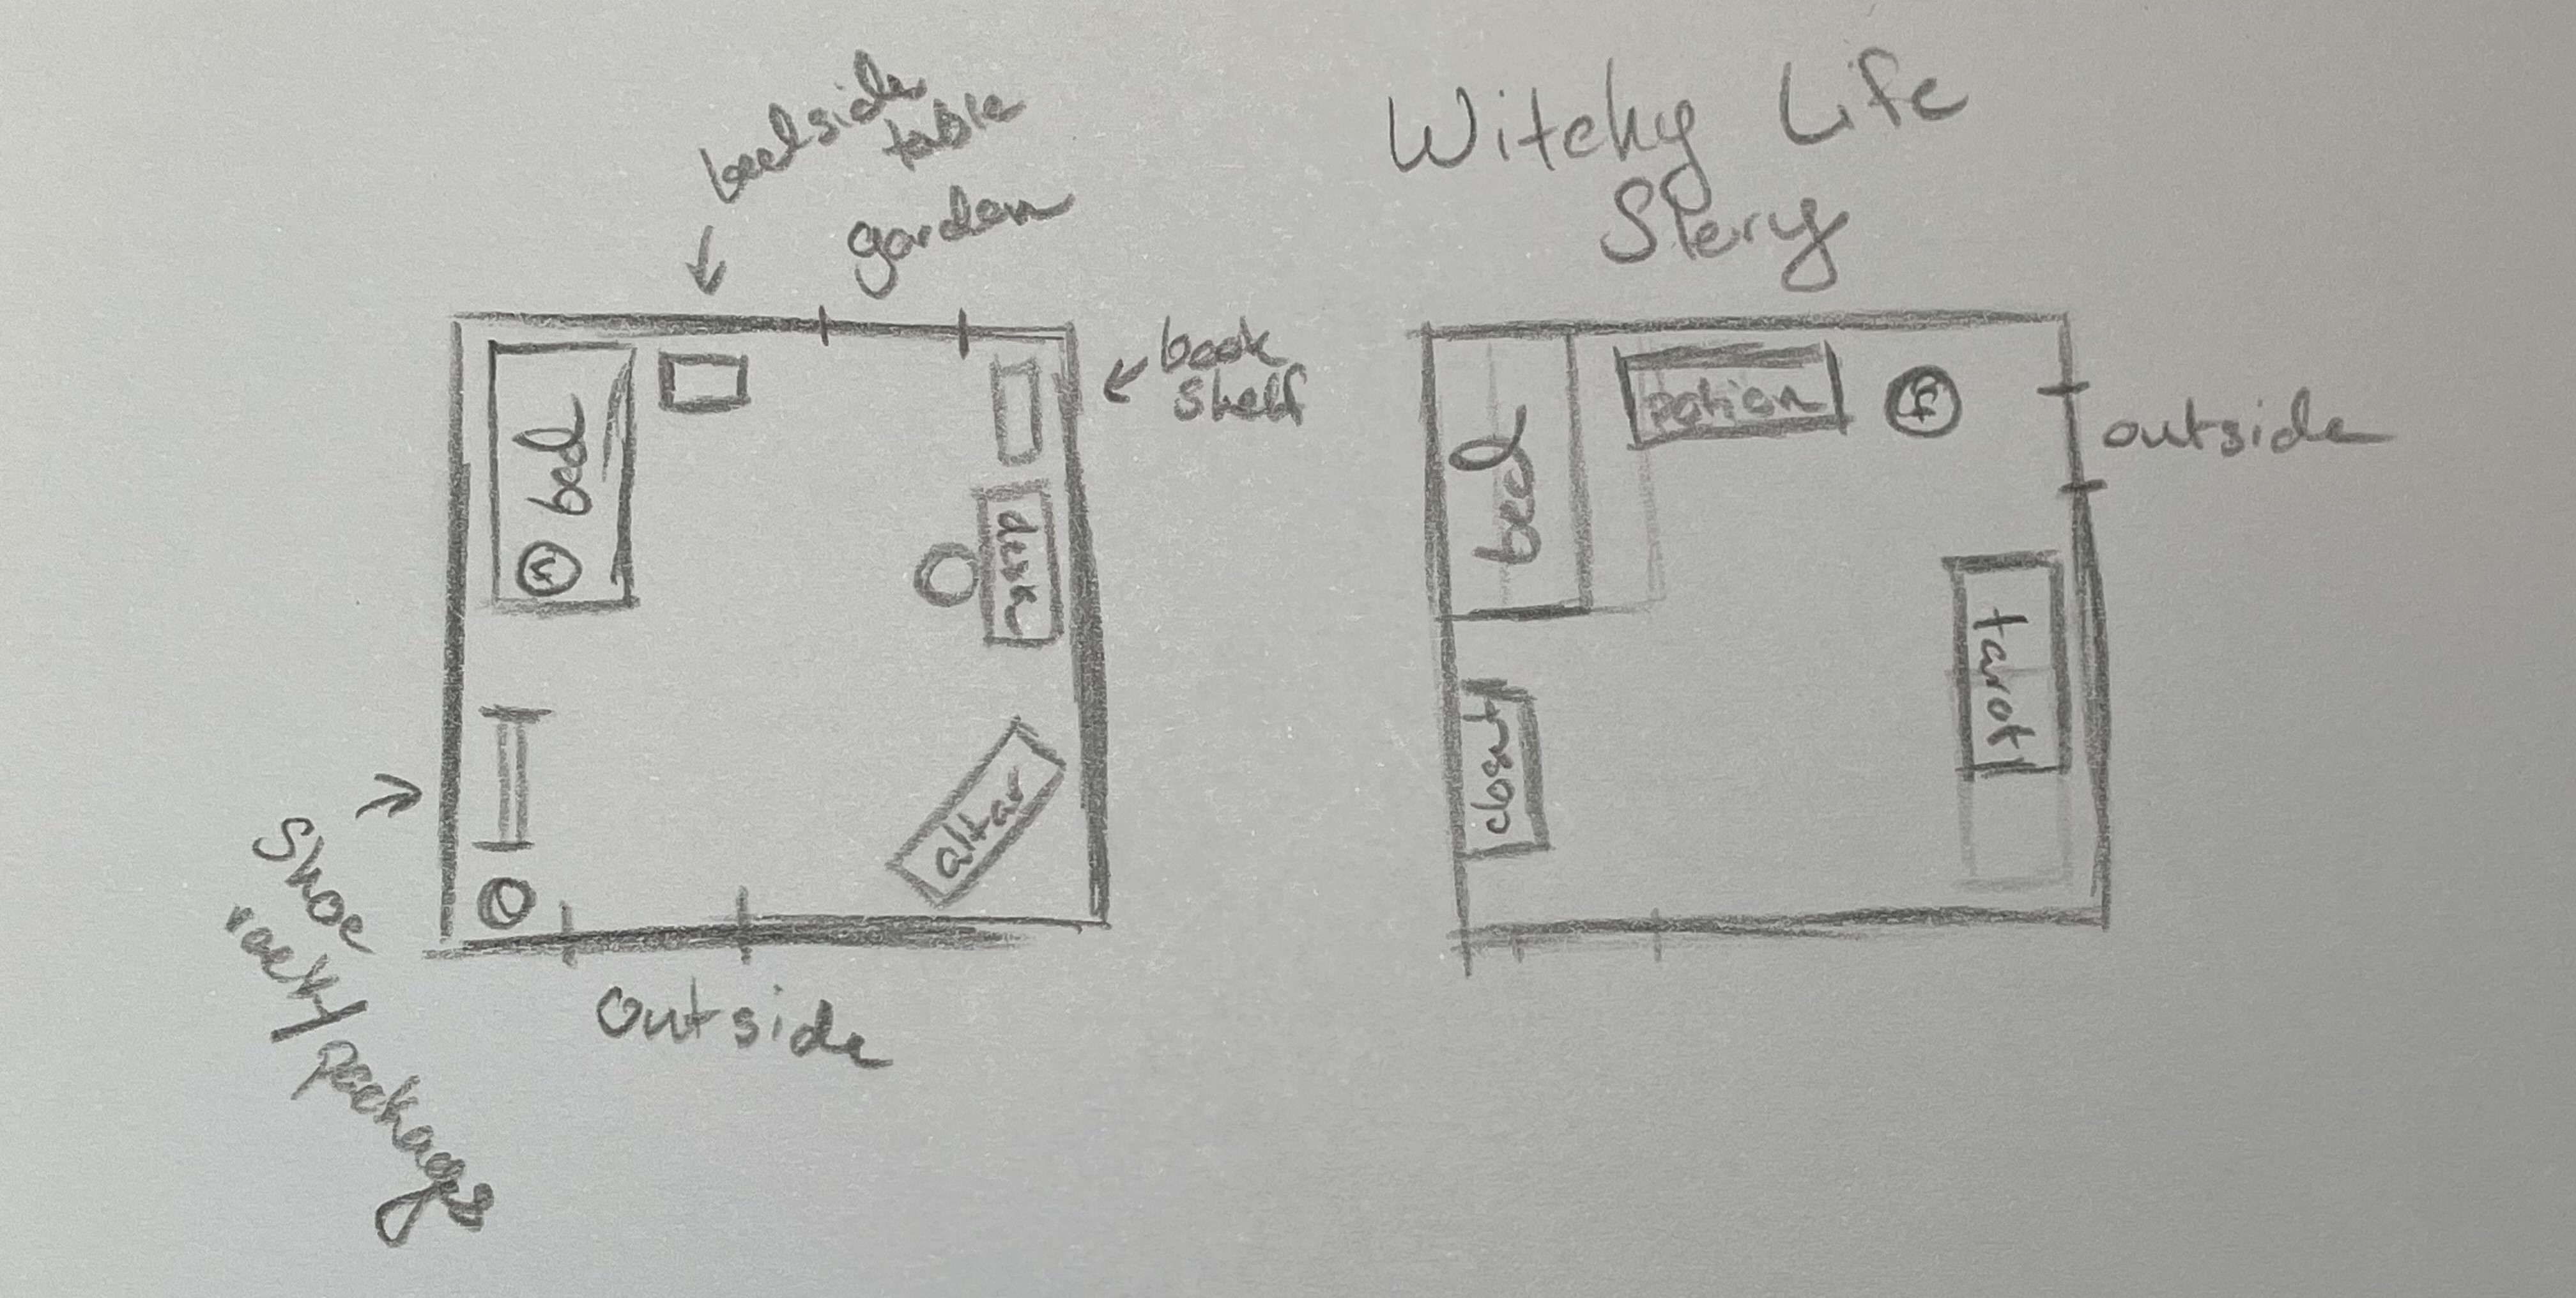
Figure 1.2.1 - The layout of the room, with Whichcraft on the left and Witchy Life Story on the right
Section 1.3 - Asset Design
As with my last project, I knew I would not be required or graded on making my own assests, but with wanting to start my own company, I knew that in the beginning, I more than likely would be doing so. And once again like my last project, I used a common "perspective hack" in the drawing community, I planned it out in
The Sims 4 first.
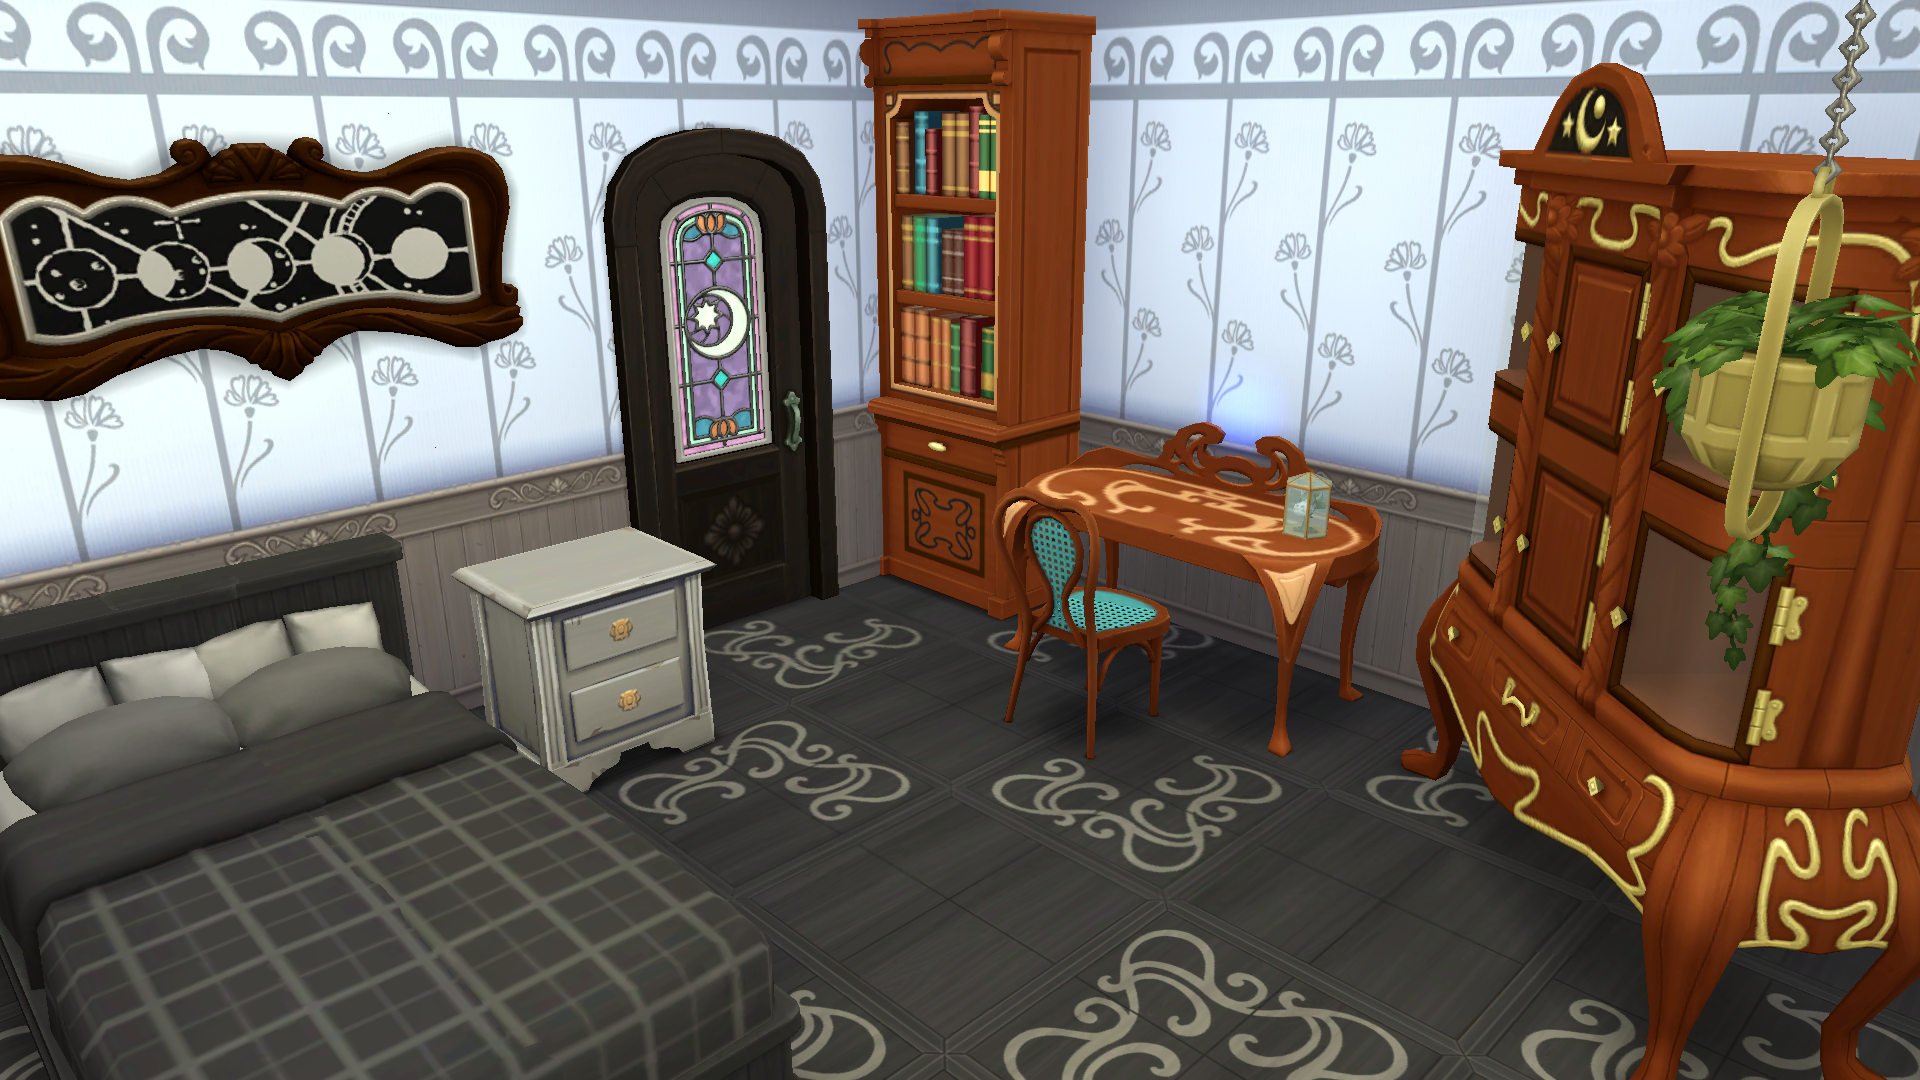
Figure 1.3.1 - The room design planned out in The Sims 4
However, like the previous semester, I encountered a problem with creating the digital assets myself. My computer was a touchscreen that I intended on using my stylus to draw on, however, in the very beginning of the semester, it got stepped on (by me, that was my fault). The screen cracked and while the display still worked, the touchscreen aspect was dead. However, I took this difficulty in stride; I had always considered using physcial art to create my scene and decided this was the perfect opportunity to try. While I was mostly happy with how it turned out...
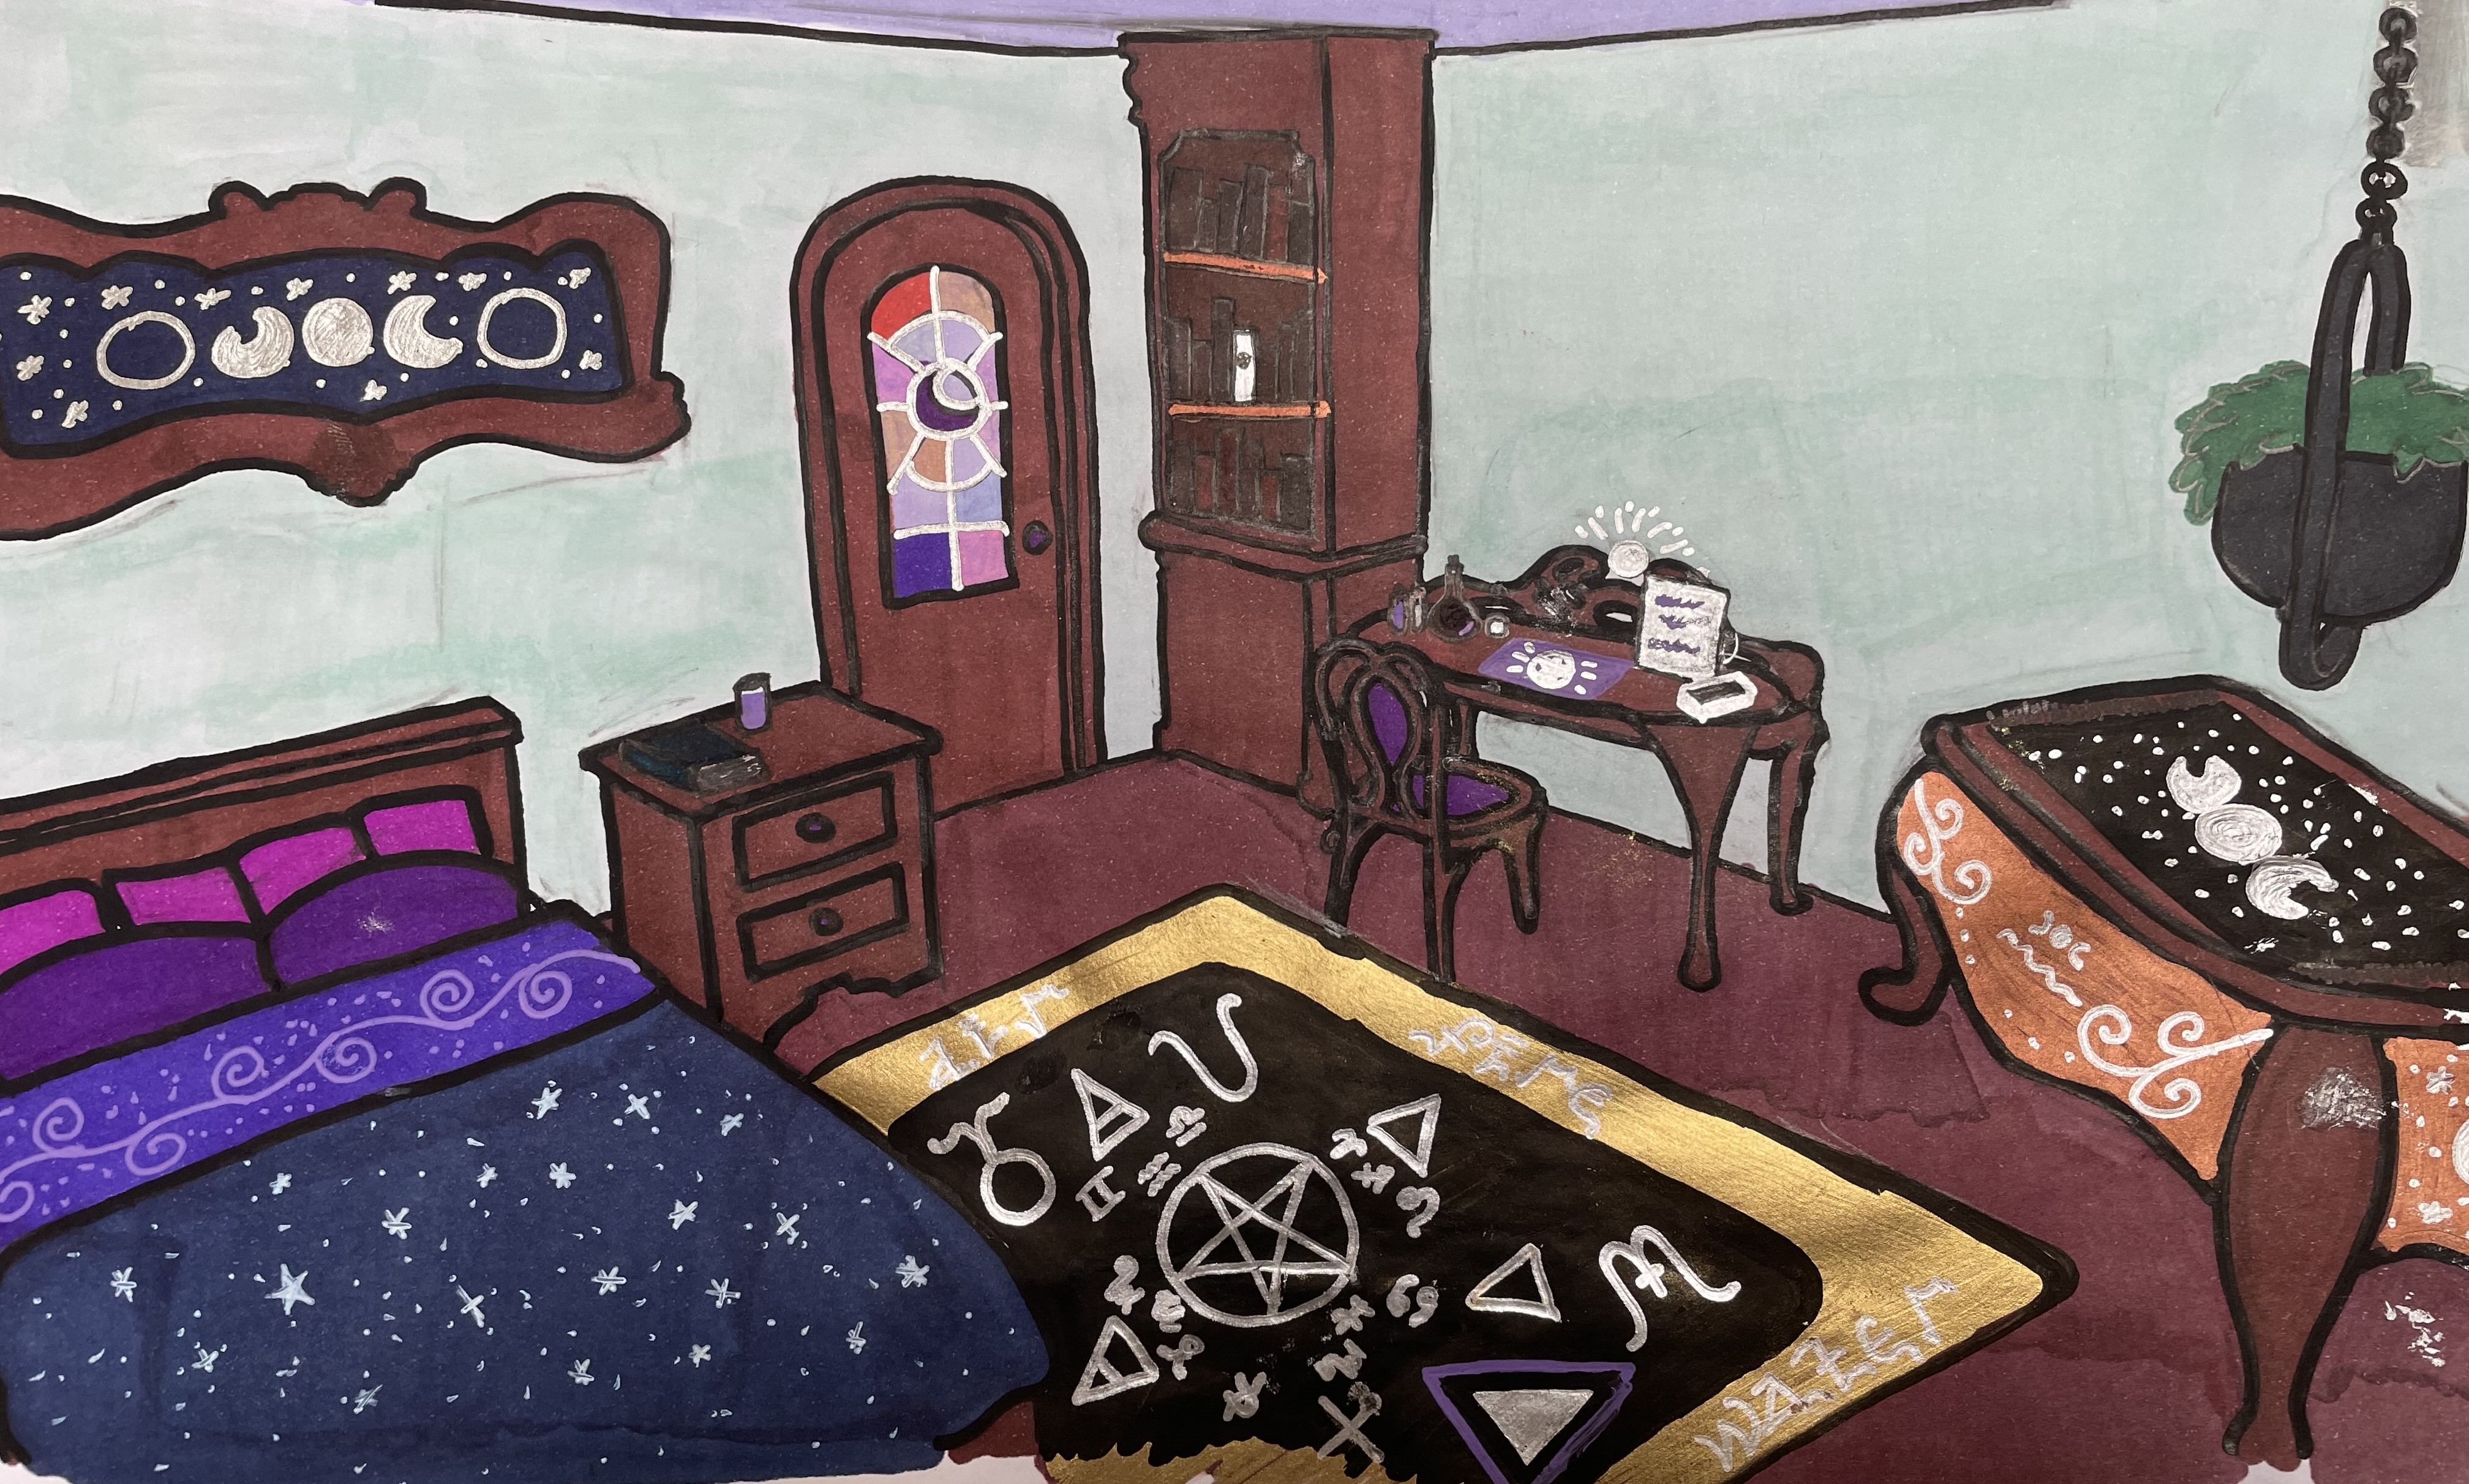
Figure 1.3.2 - An image of the physcial artwork for the room design
Once I scanned it and uploaded it, it turned out incredibly dark. I attempted to edit it, to smooth out some rough bits and lighten it overall but it never worked properly and I was left extremely disappointed.
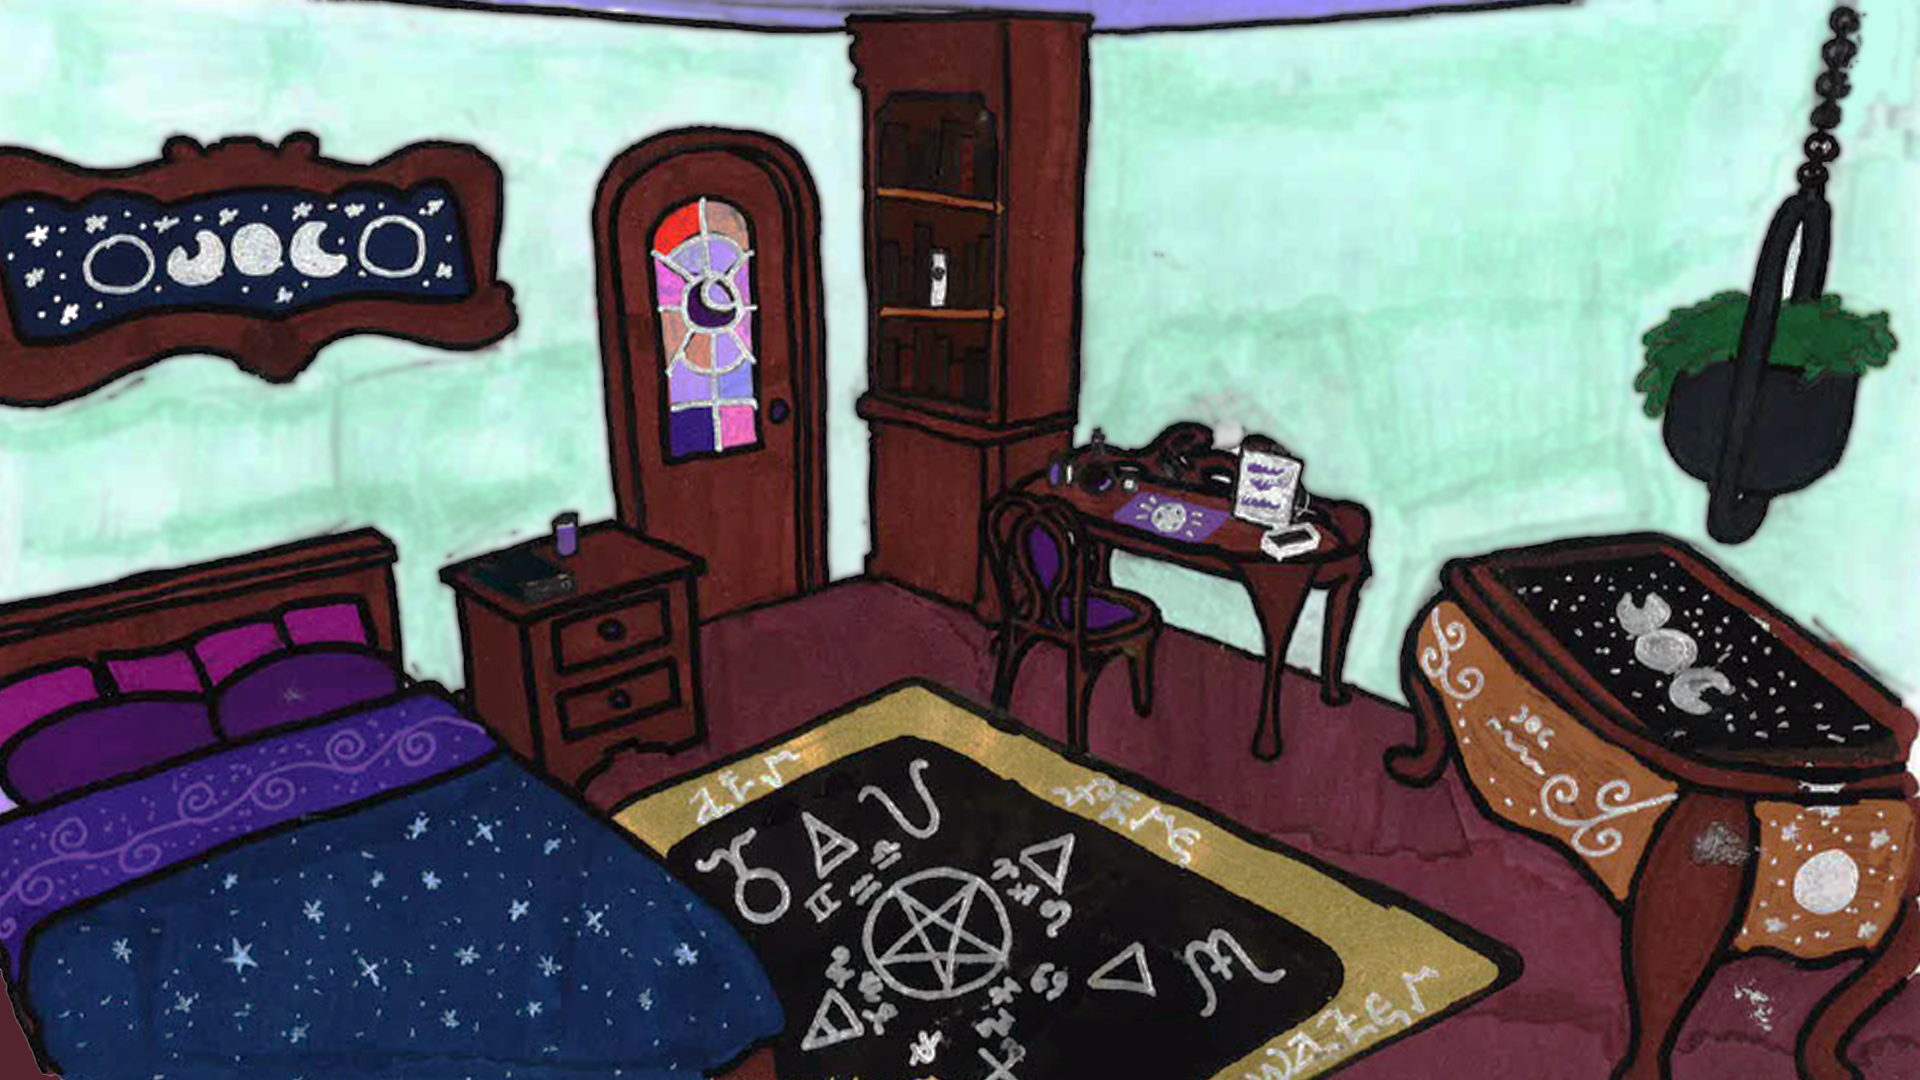
Figure 1.3.3 - The scanned and editted version of the previous artwork
Section 2 - Creation
Section 2.1 - Scenes and Colliders
Accepting defeat with my attempt at assets, I utilised what I learned from my previous project to create this game in the same way. However, one thing that always bothered me about Depression Simulator was the simple box colliders I used, and how they didn't fit perfectly with the items. I did some research and discovered polygon colliders that allowed me to make more elaborate shapes.
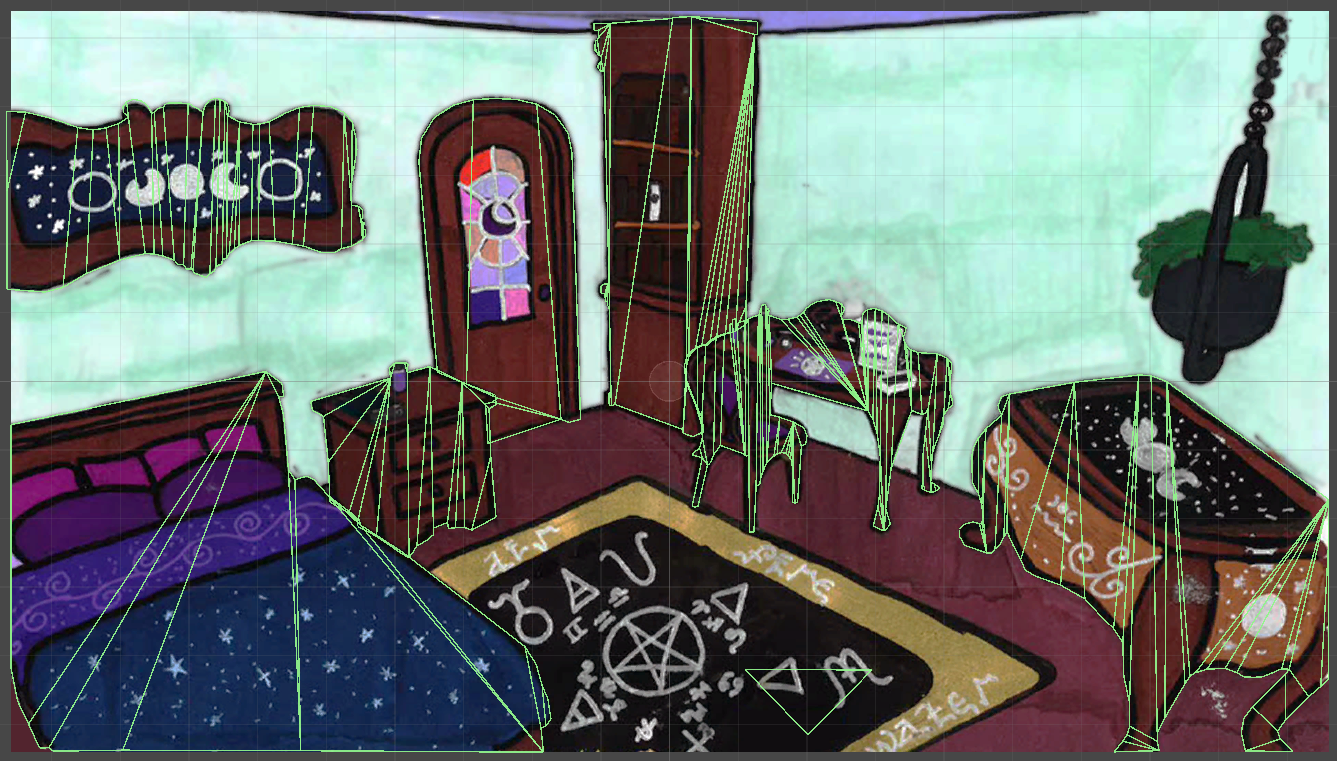
Figure 2.1.1 - The scene with colliders around each object
As I did with the previous project, I created the cursor manager and this time, did not put any unnecessary code into the update so as to not cause any lag.
                public void MouseOver ()
                {
                    Cursor.SetCursor(cursorTexture, hotSpot, cursorMode);
                    //Debug.Log("Moused Over");
                }

                public void MouseOut()
                {
                    Cursor.SetCursor(null, hotSpot, cursorMode);
                    //Debug.Log("Moused Out");
                }
Then I added the interaction to the colliders themselves.
                void OnMouseEnter() {
                    CM.MouseOver = true;
                    CM.MouseOver();
                }

                void OnMouseExit() {
                    CM.MouseOver = false;
                    CM.MouseOut();
                }
Section 2.2 - Interactions
After that, I wrote the code that would allow you to interact with different items within the room
                void OnMouseDown() {
                    //Debug.Log("Clicked");
                }
My next step after that was to add the UI Menu for each object appearing but prior to that, I needed to make the UI menus. I used Unity's built in UI elements to create the menus and buttons for each of them. After that, I was going to work on adding interactions between the code and the UI, however some life events came up and I was unable to do so before the semester finished.